

Let’s agree on one thing: most contact pages are wasted opportunities. Visitors arrive with interest, but confusing layouts, long forms, or weak calls-to-action quietly push them away.
The good news? You don’t need advanced coding or expensive tools to fix that. With WordPress and Elementor, you can design a high-converting contact page that builds trust, removes friction, and encourages visitors to take action.
In this step-by-step guide, you’ll learn how to design a high-converting contact page with Elementor, including layout best practices, conversion optimization tips, common mistakes to avoid, and real-world strategies used by successful websites.
Why Your Contact Page Matters for Conversions
Your contact page is often the final step in the customer journey. Whether you’re a small business owner, web designer, or marketer, this page directly impacts:
- Lead generation
- Sales inquiries
- Client trust
- Conversion rates
A well-designed contact page reassures visitors that you’re legitimate, responsive, and easy to work with.
Preparing Your WordPress Site for Elementor
Before designing your contact page, make sure you have:
- WordPress installed and updated
- Elementor (free or Pro) activated
- A fast, responsive theme (Astra, Hello Elementor, GeneratePress)
Then:
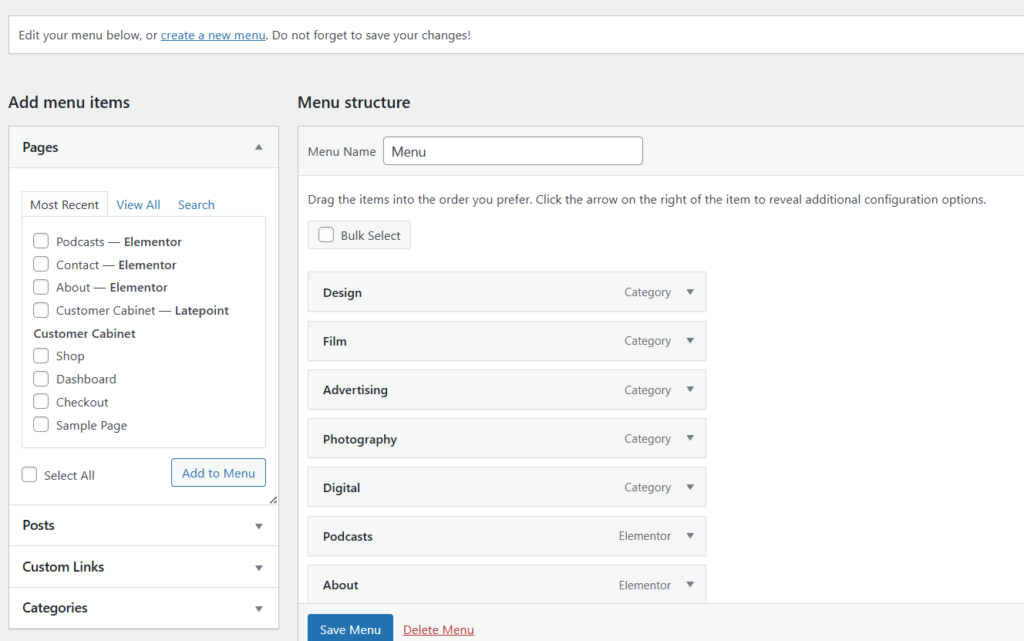
- Go to Pages → Add New
- Name the page “Contact Us”
- Click Edit with Elementor
Step-by-Step: How to Design a High-Converting Contact Page with Elementor
Step 1 – Add a Clear, Benefit-Focused Headline
Your headline should answer why someone should contact you.
Examples:
- Let’s Discuss Your Project
- Get a Free Consultation Today
Elementor Widget: Heading
Best Practice: Focus on benefits, not just “Contact Us.”
How to Design a Website Service Page Using WordPress
How to Design a Responsive Website on WordPress Using Elementor
How to Design a Website About Us Page on WordPress Using Elementor (Beginner Guide)
Step 2 – Write a Short Supporting Message
Add a short paragraph under your headline to reduce hesitation.
Example:
“Fill out the form below and we’ll respond within 24 hours.”
Elementor Widget: Text Editor
WATCH FULL VIDEO TUTORIAL
Step 3 – Create a Simple, High-Converting Contact Form
Use Elementor’s Form widget.
Best practices for conversion:
- Ask only for essential fields (Name, Email, Message)
- Avoid phone numbers unless necessary
- Use conversational labels
- Replace “Submit” with action-driven text like Send Message
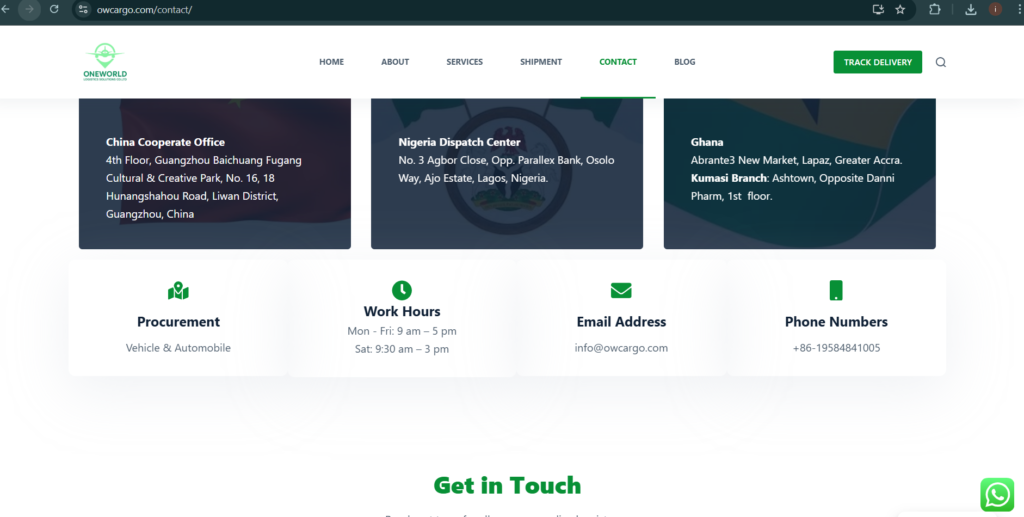
Step 4 – Add Trust Signals
Trust reduces friction and increases form submissions.
Consider adding:
- Business address or service area
- Phone number or WhatsApp link
- Testimonials
- Client logos
- Google Map (optional)
Elementor Widgets: Icon List, Testimonials, Google Maps
Step 5 – Optimize Layout and Visual Hierarchy
A clean layout improves user experience and conversions.
Tips:
- Keep the form above the fold
- Use white space generously
- Align content in a single-column layout
- Avoid unnecessary animations
How to Create a Website Homepage in WordPress (Easy Guide for Beginners)
Beginner’s Guide to Learning Web Design Step by Step
Step 6 – Make It Mobile-Friendly
Over 60% of contact form submissions come from mobile devices.
In Elementor:
- Switch to Mobile View
- Increase button size
- Adjust padding and font sizes
- Test form usability
Step 7 – Add a Confirmation Message or Redirect
After submission, reassure users.
Examples:
- “Thanks! We’ll contact you shortly.”
- Redirect to a Thank You page
This builds confidence and prevents duplicate submissions.

Conversion Optimization Best Practices
To maximize results:
- Use one primary call-to-action
- Remove distractions (menus, extra links)
- Use friendly, human copy
- Test different headlines and button text
- Ensure fast page loading speed
Common Contact Page Mistakes to Avoid
Avoid these conversion killers:
- Too many form fields
- Generic CTA buttons
- Hidden contact details
- Poor mobile design
- Broken forms
- No response-time expectation
Even small fixes can dramatically improve performance.
Recommended Elementor Widgets for Contact Pages
- Heading
- Text Editor
- Form
- Icon List
- Button
- Google Maps
- Testimonials
Using fewer, well-placed widgets keeps the page fast and focused.
FAQ – Designing a High-Converting Contact Page with Elementor
What makes a contact page high-converting?
A clear headline, simple form, trust signals, mobile optimization, and a strong CTA.
Should I use Elementor Pro for contact pages?
Elementor Pro offers advanced form integrations, but the free version is enough for most small businesses.
How many fields should a contact form have?
Ideally, 3–4 fields. Fewer fields generally lead to higher conversion rates.
Where should the contact form be placed?
Above the fold or immediately after the main headline for maximum visibility.
Learning how to design a high-converting contact page with Elementor can significantly impact your leads and sales. With the right structure, clear messaging, and conversion-focused design, your contact page can become one of the most powerful pages on your website.
Treat it as a conversion tool, not just a form, and you’ll see the difference.
Table of Contents
Pages
Latest Posts
- How to Turn a Smartphone Into a Full-Time Income Machine: Step-by-Step Guide.
- Essential WordPress Security Tips to Protect Your Website Effectively
- How to build your first website using Elementskit for free
- WordPress Posts vs Pages: What’s the Difference and When to Use Each
- How to Write Your First WordPress Blog Post (Step-by-Step Beginner Guide)


[…] How to Design a High-Converting Contact Page with Elementor (Step-by-Step) […]
[…] How to Design a High-Converting Contact Page with Elementor (Step-by-Step) […]
[…] How to Design a High-Converting Contact Page with Elementor (Step-by-Step) […]